Posts tagged ‘photo retouching’

March 7, 2013

Photo Retouching: Moving Mainstream, Full-Speed

When Photoshop arrived 24 years ago, the photography community was up in arms as it was affecting photographic truth, according to David Hlynsky, a University of Toronto professor in Photoshop and digital media.

Leaving aside the point that photography is more of a point of view than the truth, the question is whether photo retouching is any more dishonest than wearing makeup.

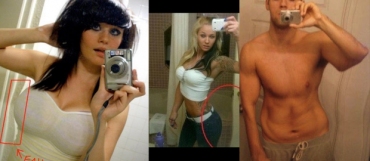
Now photo retouching is moving mainstream – there is no doubt about it. According to a research conducted by Glamour magazine, nearly 60 percent of respondents feel it’s OK for a woman to tweak her personal pictures, and 23 percent of women ages 25 to 29 do it; that number climbs to 41 percent among those ages 18 to 24. “Several years ago, retouching personal photos would have seemed strange, even vain,” says Ann Kearney-Cooke, Ph.D., a Cincinnati psychologist and coauthor of The Life You Want.“This survey shows it’s common and women are fine with it.”

“[Retouching] is the nature of the digital age, we edit because we can,” says Professor Hlynsky. “Technology will process our image whether we like it or not.”

Why do we do it? Your photo makes a big difference in how people perceive you, so you want to put your best foot forward. Photo editing can help a picture appear to be more professional, and can express one’s personality better. That is if it’s done right.

Self-Photoshopping-fails

SOURCES:
Retouching: How Much Is Too Much? – Glamour
Personal Photo Retouching: Millennials Going To Great Lengths For Perfect Pictures Online – Huffington Post
Self-Portrait Photoshop Fails – Resource Magazine
 

photohand-photo-improvement-correction-retouching-ad

July 20, 2012

Modern Wedding Book Trends: Vignetting

Before digital cameras vignetting was an unintended and undesired effect caused by camera settings or lens limitations. Now it is purposely introduced for creative effect, such as to draw attention to the center of the frame.

It also helps the photos blend well with dark colored background of layouts. This design element serves particularly well for large photos, especially portraits.


MODERN WEDDING BOOK TRENDS:
Vintage Style Photography
Black and White Photography
Vignetting

June 21, 2012

Modern Wedding Book Trends: Vintage Style Photography

Old is new this season. Vintage imitation has been in for Save the Date cards and wedding invitations for quite a while and now the trend seems to be extending to the the wedding albums. You certainly don’t want the whole wedding book to look vintage unless your wedding was staged in a vintage style – Roaring 20s, 30s Hollywood, 70s Disco…

Usually, you would want to have some vintage elements incorporated in the design. This can be sepia-toned photos, artfully grainy or faded photos for the background images of the layouts.

The book cover stylized as an old photo will make for a nice decorative element on your shelf.

Compare to the original photo below. Before converting it into sepia, PhotoHand designer retouched the image by eliminating the “view spoilers” – the pipe and the pigeon at the groom’s chest level. Then the photo was brought to the most fitting lightness and color level to produce a bright picture.

 
MODERN WEDDING BOOK TRENDS:
Vintage Style Photography
Black and White Photography
Vignetting

January 17, 2012

Cropping Photos to Improve the Visual Effect

Cropping is a useful tool for photo improvement. Though it sounds like an easy trick, cropping is more art than science and you need an eye for it. Still there are some general guidelines that can help you improve the visual effect of your photos.

Focus in!

Crop to bring the attention to the main object or person. In a portrait, the person’s eyes are the focal point. If the person is looking sideways, make sure to allow ‘space’ for her to look into or include enough of the object so the viewer knows what the the person is looking at. Otherwise the viewer will wonder what is missing.

Cropping also lets you remove the parts of the picture that didn’t turn well, let’s say because of awkward posing like in the example below.

Don’t amputate!

Cropping off people’s limbs at joints makes them look like amputees. Despite a very popular concern, it’s okay to crop part of the head if it’s a close portrait, as it will bring more attention to the eyes.  Cutting between the joints is alright as long as it’s still possible for the mind’s eye to fill in the blanks to complete a person’s torso or limb.

An example of bad cropping where the hand cut off at the wrist appears detached. The only way to fix this effect is to re-crop the photo to a close portrait.

Combine tilting with cropping!

In some situations tilting can save the day when you realize the only photo that you like is still bad.

Remove distractions!

Remove the view-spoilers, parts of unidentifiable objects and things that distracts from the story the image is telling.

Someone's back was a view-spoiler in otherwise a nice portrait. The photo allowed for easy cropping that brought the new balance to the composition by seemingly adding to the empty space in the direction of the person' glance.

Watch the ‘negative space’!

This is the space around the central object. Cropping too tightly will make the photo look awkward.

Cropping Contextual Images

The images surrounding the person or the object in the center of attention serve as the context and create the picture story and establish the mood. It becomes a critical compositional component that need to be cropped to have a balanced visual effect. To reach the optimal result, it is recommended to follow the Rule of Thirds.

The Rule of Thirds: Divide the frame into thirds horizontally and vertically. The points where those lines intersect are good starting points to place the main subject. Essentially the primary subject is slightly off center.

In the original photo the person is put squarely in the middle and the background is cropped too tight leaving no breathing space above and below the figure. By cropping right below the hand (not to lose the gesture) and reducing the space on the left we re-balance the composition to bring it it in line with the Rule-of-Thirds.

You might find it impossible to follow all these rules as they start to clash when your photo has more than one problem. You would need to compromise or send it to us at PhotoHand and we’ll apply more advanced techniques to perfect your mementos.

………………………………………………………………………………………………
You might also want to read:
Cropping Photos to Match Printing Standards
Other Point-and-Click Tips

January 16, 2012

Cropping Photos to Match Printing Standards

Cropping is used to make your shots fit the standard photo paper sizes. It’s done by bringing the aspect ratio of your photo to the aspect ratio of a standard print size.

An aspect ratio is simply the ratio between the width and height — the shape of an image. A square photo, for example, would have a 1:1 aspect ratio where the width is the same as the height.

Most digital point-and-shoot cameras have a set frame aspect ratio of 1:1.33 (known as 4:3) when most DSLRs use the aspect ratio of 1:1.5 (known as 3:2).

In comparison, standard photo paper sizes have the following aspect ratios:
6″x4″ – 1:1.5
7″x5″ – 1:1.4
10″x8″ – 1:1.25

As you can see the DSLR aspect ratio fits the format of 6″x4″. In other situations you need to crop your photo.

It is recommended that you crop the photos yourself before sending them to a printer. Otherwise they will use their own judgment what parts of the photo can be sacrificed.

If you need a photo editor, we recommend using GIMP – free open-source software that has been around for quite a while:

for Windows:
http://www.gimp.org/downloads

for Mac
http://www.gimp.org/macintosh

April 27, 2011

PhotoHand presents its services at My Freaking Wedding Bridal Show in New York

On April 17, 2011 PhotoHand.com presented its services for photo improvement, wedding book design and save-the-date card design as well as wedding invitation package design at My Freaking Wedding Bridal Show in Manhattan.

My Freaking Wedding, a bridal show organizer supported by an off-beat content website filled with tips on how to add flavor to the tried and true wedding routine partnered with a dozen of wedding vendors to feature local products and services that are the “hidden treasures” of New York.

The event was filmed by a talented New York director Rene Ortiz.


Share this post on Tweeter

Bookmark and Share

January 13, 2011

PhotoHand is Named to the 2011 Wedding Professional Hot List

13 Jan, 2011 – MomentVille.com, one of the worlds leading wedding websites, has just announced that PhotoHand has been selected for the 2011 Wedding Professional Hot List.

The annual Wedding Professional Hot List recognizes excellence within the wedding industry, as determined by reviews from tens of thousands of brides and grooms. PhotoHand was among the best reviewed vendors in their area in the past year.

“The Wedding Professional Hot List recognizes best of class wedding professionals.” said Geoff Evason, MomentVille’s CEO. “Highlighting the success of the top wedding professionals is an exciting way to spread the word and help newly engaged couples find the right professionals for their own weddings.”

About PhotoHand
PhotoHand will retouch your wedding photos at the starting fee of $3.50/photo for complete cosmetic photo retouching. Also, on offer there are custom-designed save-the-date cards and wedding invitations and wedding photo books from your photo material. With professional photo editing and photography retouching, skillful cropping and art effects, your book becomes an outstanding memorable piece.

About MomentVille
MomentVille.com offers engaged couples and wedding enthusiasts a one stop place for planning and sharing a wedding. Offering personal wedding websites, wedding planning tools, a gorgeous gallery of wedding pictures, a searchable list of reviewed wedding vendors, and lots of helpful and inspiring wedding content, MomentVille helps newlyweds with all aspects of their wedding. For more information contact media@momentville.com

Share this post on Tweeter

Bookmark and Share

Enhanced by Zemanta
December 12, 2010

Photo Retouching: Going Mainstream

Photo retouching, a.k.a. photo editing or airbrushing, is as old as photography itself. But only with the advent of the digital revolution that overturned a lot of concepts in the Photography industry since the beginning of this century, photo retouching became commonplace, extending to family photography – professionally taken as well as amateur shots.

Photo retouching services became affordable to any budget ($3.50/photo at PhotoHand.com) and easily accessible over the web. You can order it 24/7 just like you order books or clothes.

Just decide what you don’t like about the photo, check the pricing schedule and go to the order form to upload your shots and type in your instructions. You will get your images back in the same resolution without any marks claiming the copyright over your photos.

Photo retouching (“photoshopping”) does not mean altering the photos completely, rather it simply modifies the images and removes the flaws originating from technical and non-technical faults.

Besides the lighting that you normally don’t have control of outside the studio, there are a lot of mishaps that can ruin the view: exit signs spoil the mood in the wedding pictures and so do slight wardrobe malfunctions like skin overflowing the edge of a sleeveless wedding dress (happens even to the skinniest brides), twisted tense smiles resulting from prolonged posing, electrified hairs crossing faces… There is no reason now to put up with these imperfections that spoil otherwise a perfect memento.

Of course, it takes skill, experience and artistic perspective to improve and sometimes rescue the photo without affecting the originality of the image. Luckily, now the magazine-quality photo editing services are available to every mom, newlywed, serial dater, actor, musician, aspiring model, pageant contestant, starting out fashion designer, beauty professional, life coach… everyone.

Share this post on Tweeter

Bookmark and Share

Enhanced by Zemanta
December 3, 2010

Bringing Glamour to the Masses – This Holiday Season & Always

Share this post on Tweeter

Bookmark and Share

June 14, 2010

Comp Cards – How To and What Works

As PhotoHand gets more and more orders for comp card design we also receive more requests to help in picking the photos for our model clients. We hope this post will be useful in this task.

General
A model comp card has a front side with a full size portrait and a back side with a selection of representative shots from the portfolio — and the model’s basic stats (see below) and contact information — printed on both sides of an 8.5″ x 5.5″ piece of card stock (12 pt stock) (US) or 15×21 cm (Europe, Asia).

Think of your comp card as your marketing tool. This will determine how you want to pose for it and which photos to choose. The casting manager will hardly look for Miss Congeniality with a big teethy smile. Neither is important how pretty you are. What is important is HOW GOOD YOU ARE AT MODELING.

Number of Photos
You need one good headshot for the front side and 4-5 photos for the back of the comp card.

Photo Size
Photo should be at least one Megabyte (=one Megapixel) in size for quality printing, especially the headshot for the front of the comp card.

Posing
Before the photoshoot, pick a dozen of poses you think you can imitate from fashion magazines and practice them in front of a mirror until they feel natural. Strike poses that show elegance and power.

Facial Expression
Some very good photos of you are only good for the family photo book. Nice smiley pictures won’t get you very far. You will not get booked because you are a nice person. Look at the glossies, the models there are all pouting or spot a faint smile. No big teeth smiles.

Make sure your face is not tense. During the photoshoot, close your eyes, think of something and then open your eyes. This usually does the trick.

Front Photo
For the front of the comp card, select your best ¾ portrait shot.

Back Photos
You’ll need 4-5 photos for the back of the comp card. Make sure that at least one photo shows you in full height.

Versatility
The photos at the back should show the different sides of you: glamorous, bohemian, sporty, sexy, grungy, country, business… whatever style you can master. This was you will present your true potential to get you bookings.

Model Stats

For Men For Women
Height Height
Shirt Bust
Waist Waist
Shoes Hips
Hair Color Shoes
Eye Color Hair Color
Eye Color

Comp Card Design
Your comp card needs to have a pleasing, not to mention professional, look to attract the attention of the casting manager. This is like packaging for a product. Even if you are not so happy with the results of your photoshoot, your photos will shine when cropped for the maximum effect, or tilted, and nicely arranged in an elegant format.

Take it from the professionals. This comp card that we retouched and designed some time ago, was used in a television program in Canada as a sample of how to design comp cards that get you jobs.

We hope you find these tips helpful. Good luck!

Related Posts: Modelocity Magazine Gives PhotoHand Thumbs Up

Bookmark and Share

SHARE on Facebook >>